 If you are in the habit of doing elaborate and detailed piercing, you have probably discovered that it’s easy to make crevasses and crannies with a saw blade that are tough to clean up and finish with even the smallest needle or escapement files. It probably also really annoys you when you can’t get your lines as exquisitely clean and crisp as you want them. Fret no more! There is a way to sand the edges of even the smallest fissure….
As usual, you will need some stuff….
Materials & Tools
- leftover strips of sand paper (saved from making Custom Sanding Sticks, right?)
- strapping tape (the kind with fibers running the length of it)
- scissors
- saw frame
1) Cut a piece of your sand paper that’s the same length as a regular saw blade (5-1/8″ or a bit longer if you like).
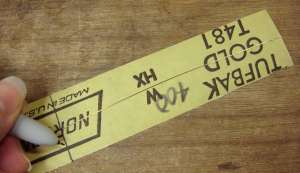
2) Cover the back of the strip of sandpaper with strapping tape. Don’t overlap the tape, but do cover the surface completely, and make sure the fibers in the tape run along the length of the paper.

Some strapping tape has fibers running in only one direction, some has a grid of fibers. Both work fine.
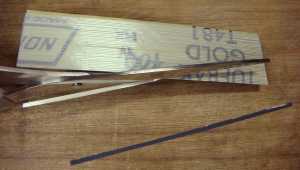
3) Cut narrow strips of your strapping-tape-backed sand paper. Put any extra cut strips into an envelope, cigar tube, or other marked container, so you know what grit they are.
4) Clamp one end of the strip into your saw frame, and thread the strip through the hole you want to sand. When you clamp the second end of the sandpaper strip into the saw frame, put only a small amount of tension on it. The fibers in the strapping tape will hold the strip together and prevent it from tearing immediately in two, but the tape can only handle a fraction of the tension you can put on a steel saw blade.
5) Use a regular sawing motion to sand, pushing slightly towards the side with the grit on it. The beauty of the micro sanding strip is that it cuts when moving both up and down, rather than only on the down stroke like a saw blade. Of course, it also cuts on only one side. You can make wider strips – up to the width of the clamp area on your saw frame – but the narrowest strip you can make will be one with only a single fiber from the strapping tape running down the back of it.
Easy peasy.
xo,
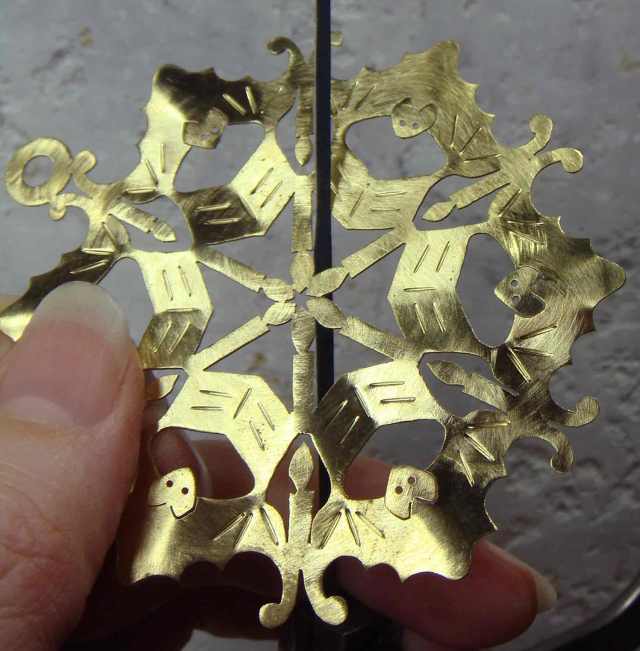
P.S. The ornament I’m sanding in the photos? That’s a piece I made for the annual Christmas Ornament Exchange Holiday Party held by the Seattle Metals Guild. I seem to have fallen into the habit of always making an ornament with a bat theme :). This one is a snowflake of caroling bats, hence the sheet music and the candles. The beautiful hostess of the 2013 party drew my name and received this ornament. Most fitting!
P.P.S. Did a friend forward this post to you? Did you stumble on it by accident? Want to eliminate the element of chance? Click here to get on my direct list.


Thanks for the great tip ,it will make things so much easier !
this is brilliant…
Very good tip! Really appreciate the sharing…!
The micro sanding strips are an absolutely fabulous idea – thank you so much for sharing it!
Great tip!
I needed exactly this right now. Genius idea! Thanks for sharing 🙂
That is SO helpful! Thank you! 🙂 also could you tell me the name of your saw? I have been looking for that particular one?
Hi Halli, I’m glad you found the post helpful. I believe I bought my saw from Otto Frei. They still carry one called the “Quick Change Lever Style Fixed Sawframe”, which is kind of a mouthful, but at least a very descriptive mouthful. Here’s a link to it on their site: http://www.ottofrei.com/Quick-Change-Lever-Style-Fixed-Sawframe-3-75mm-Deep-Throat.html
Thank you for your help on the sanding stones and the sanding stripes. The sanding stripes are a wonderful idea and I already have everything in my shop so I think I will try this first.
Excellent! It’s always a boost when you discover you have everything you need already :).
Great idea, thank you! Would it be possible to cut a strip twice as wide, fold it in half and use it that way? It seems like it might make it a bit stronger and give you a 2-sided sanding strip to boot, or does that make it too thick?
Hi Lynn, I think that would probably work beautifully, if there is enough room in the space you are sanding to accommodate a thicker strip. I imagine your idea would be particularly suited to sanding deep into pointy corners, since you’d have an abrasive surface right on the fold that you could push into a corner. Try it and let us know :)!
Hi Julia, I was Googling that quick-change saw and your site came up… btw, I just subscribed to your newsletter : ) … any cons to this saw? Would you buy it again?
Hey Robin, That cam-lever style saw frame was my favorite for many years and I still use it for taking classes and teaching (it travels with me). No cons that I can think of, and you can’t beat the incredibly reasonable price of $15 ! I love to do piercing, and being able to change the blade easily while there’s a piece of metal hanging on the blade is super important :). The stay-at-home saw I use now is the Knew Concepts saw frame with lever tensioning (I have the one that swivels, but it’s a bit fiddly, so if I were doing it again, I’d just buy the $69 one with lever tension and no swivel): http://www.knewconcepts.com/3-inch.php
Awesome! I was just looking at it again on OttoFrei when your answer came in. I think you’ve just made a sale for them! Thanks for the informative answer, and I look forward to reading your newsletters!
So glad to come across your review of that saw frame; I’ve been considering purchasing one for myself too, and now I think I will!
Thanks 🙂